
Introduction:
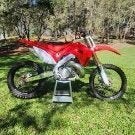
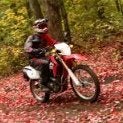
I recently bought a lightly used DR Z400E instead of the street version of the same bike. Rather than do the sensible thing and buy a complete dual sport conversion kit, I chose to save a little money, and use parts I already had plus buy a few new ones to make it street legal in Nevada.
Nevada has pretty relaxed rules for licensing a motorcycle for street use. They will license a motorcycle with fenders, lights (headlight, turn signals, and brake), mirrors, horn, muffler and reflectors. Even tho it isn't required to get a license plate, I put a speedometer on the bike just to keep track of my speed and mileage and mounted DOT tires for better performance on the highway and to avoid problems with the police after the bike had a plate.
The project:
Since the DRZ400 already has stock fenders, muffler and is an E (electric start) model, to get a plate I needed to add mirrors, lights, reflectors and horn -- and a wiring harness to connect the lights,switches and horn together. All these parts are readily available separately from many sources, except for a model specific wiring harness to convert a dirt bike to a street legal dual sport. I was only able to find such wiring harnesses as part of a model specific dual sport conversion kit -- usually costing $400 and up. I believed I could save about half that amount by buying the lights and switches from the aftermarket or used on eBay, and making my own custom wiring harness out of harness removed from a street legal motorcycle model.
In fact, a DOT approved dual sport headlight, rear fender with a tail/brake light, turn signals, hydraulically activated front stop light switch, and reflectors cost under $150. Installing these items on the dirt bike is pretty straight forward but is specific to each bike model so I won't cover it here .
What follows is a description of how to adapt a street bike harness and do your own dirt bike to dual sport conversion. I also offer some cautions and recommendations along the way. Such as: don't start such a project without some knowledge of how a motorcycle lighting system works and without having necessary hand tools including wrenches and screw drivers, soldering iron, wire cutters, multi-tester, a drill and drill bits, and be able to fabricate simple mounts for your turn signals and possibly the brake light switch.
Selecting a wiring harness:
I was fortunate in having much of the electrical system from a wrecked '88 600cc Katana to use as a starting point for the project. Included were the main wiring harness and fuse block, ignition switch, and the handle bar mounted control assemblies. These are low demand items and can be found on eBay, generally for very little money ($10-$50). Search for "wiring harness with switches" or "wiring harness with controls". If you don't find what you want, search for "wiring harness" and then check the seller's other items to see if he has the controls for sale as well.
Your best bet for a donor bike is one with the least complicated electrical system you can find that will meet the legal requirements for licensing a motorcycle in your state. Popular street legal enduro models such as Suzuki DR Z400S, DR Z400SM, DR350SE or DR650SE, Honda XL's or XR-L's, Kawasaki KLR's and some KLX650's would be best. Worst choice would be a touring bike or perhaps a late model sport bike with fuel injection and other hi-tech electrical marvels. Between those extremes are plenty of acceptable donor models.
Two things to avoid: Don't buy a wiring harness that has been cut or had wires and connectors removed. You need to be the one who decides what goes and what stays on the harness. Second, don't buy a wiring harness described as a "front" or "rear" wiring harness or any other description that suggests it's not the complete harness. Most often those terms are applied to more complex motorcycles, which you want to avoid anyway. In any case, you need a complete wiring harness, not part of one.
As suggested above, it is important that you get the wiring harness and left handlebar control assembly (with high/low beam, horn and turn signal switches) from the same motorcycle or same model donor bike. Of course, the more parts you can get included with the wiring harness, the better. That way the connectors will fit together and the wire color codes will be the same thruout they system. However, things that plug into a wiring harness such as turn signals, lights, horns and most mechanical rear brake switches are generally interchangeable between bikes and brands, even if the wire color codes are different. And, you don't have to be concerned about warning sensors and lights, ignition or charging system components that plug into the wiring harness; you aren't going to be using any of those items.
Setting up:
You will need a well lit, fairly large area to work, a table top or sheet of plywood to use as a work area. The work surface should be large enough to hold the lights, horn and switches you will use (or substitutes), plus the wiring harness, left hand control, a 12 volt battery and your tools.
If you're an old school rider (over 50?) you need to know is that modern motorcycles do not use the frame as part of the electrical system as they did from the dawn of time, into the early 1980's. Separate positive (hot) and negative (ground) wires lead to each light and other component being powered by the harness. This is far more reliable than the old way and avoids problems such as corrosion and electrolysis that occur when dissimilar metals and electricity come together. Also, you will find lighter gauge wires feeding into heavier gauge wires on the same circuits, which cuts down on the number of separate wires in the harness. When it's time to cut wires out, take care not to eliminate any heavy gauge wires needed by your dual sport circuits.
Tracing the circuits:
Your first look at a wiring harness taken off the bike can be intimidating. It looks like jumble of thick and thin wire clusters with an amazing variety of connector ends. Your task is to identify and trace the wires (circuits) which deliver current from the battery, to the switches and then to the headlight, turn signals, tail light, stop light and horn. Everything else you can ignore and will eventually cut out of the harness and throw it away, leaving just the custom dual sport harness needed for your bike.
One of the advantages to selecting one of the popular models as wiring harness donor, is that repair manuals with very complete wring diagrams are readily available. If there was anything I'd have done differently for this project, it would be to have found a manual with a wiring diagram before starting to trace the circuits for the donor bike. The diagram would have made the process a lot easier and faster. But I didn't and I imagine some of you won't either.
Circuit tracing with or without a wiring diagram is more tedious than difficult. First step is to lay the wiring harness out on a table with the wires and connectors positioned as if it was on a bike (headlight connector to the front, tail light and rear turn signals to the back. This will make it easier to find wires connecting to the component parts. Place the headlight, turn signal lights, horn and tail light on the table approximately where they will fit on the bike respective to the wiring harness. You should be able to easily identify the entire circuit by following the color coded wires thru the harness. Label both ends of the circuit and as much of the wires making it up with masking tape marked to show the circuit name (for example: left turn signal, headlight high beam, etc).
If you have the wiring diagram, trace the circuits using the wire color codes and schematic. You may have to remove some of the electrical tape to get to wires clean and un-faded enough to clearly identify the color of the wire and (often) the stripe on the wire. Not a problem since you will remove all the electrical tape and coverings to trace the circuits using the color codes that will make your new harness. Once you have the dual sport circuits identified and labeled, you can begin to remove the un-needed wires from the donor harness. That process is described in the section following.
If you don't have the wiring diagram, but do have an ignition switch, turn it to ON position. If your harness doesn't have an ignition switch, you will need to find the connector it should fit into and connect the heavy gauge 12VDC "hot" input wire to the corresponding output wire in order to test and identify the system connectors. Other functions of the ignition switch (power to the ignition and parking light) are not part of the dual sport conversion and can be ignored. Connect the handlebar control switch to the wiring harness and any other components you have and can easily match the connectors for (such as the right handlebar control switch, brake switches, etc.) You will need a flasher unit to trace that circuit and operate the turn signals so be sure to install that component.
Now connect a 12VDC battery to the harness just as it would have been connected on the motorcycle and begin plugging your dual sport components (lights, horn and switches) into connectors and test the system to see if your controls operate the components. It may be necessary to change connectors on either the wiring harness or the component to get a proper fit. Be sure to solder and wrap the splices with good quality electrical tape when you do.
It's useful to have a multi-tester able to read DC volts to see which wires are hot and which are ground. Your multi-tester should also have a continuity testing function to permit testing switches and tracing wires. Sometimes you have to search for the proper connectors. When you find the connectors, make a label by writing the name of the circuit on masking tape and attach the tape to the wire near the connector. Those labels are the end point of your dual sport circuits.
Once you have the end points for the various circuits, you also have the color codes for each circuit you need to trace and are basically at the same place as if you had the wiring diagram. Remove most of the tape and shielding material around the wires of the harness. Trace each of the circuits you want to keep (lights,horn, etc) and use masking tape to keep hot and ground wires for that circuit together as long as possible. When hot circuit wires feed into heavy gauge wire, continue tracing the hot wire to its origin at the fuse block to avoid removing any important segments of the circuit later. Keep labeling the circuits as you go until you have the start, middle and end points clearly identified.
Thinning out the un-needed wires from the harness:
When all the connectors you are going to use have been labeled, you can remove unnecessary wires from the harness. It could be considered an optional step but you will make a much nicer looking harness that is easier to snake thru the frame with the extraneous wires and parts like the charging circuit, panel light wires and ignition system wires removed.
Before you start cutting and even if you have a wiring diagram, power the system with a battery and have your lights and horn connected to their respective connector plugs. As you begin cutting away unneeded wires, test and re-test each of your circuits to be sure you haven't cut a necessary wire. A little care in this step, can save you a lot of grief and time later.
You will quickly see that some color wires have nothing to do with the circuits you intend to use. These will be for thing like oil and temperature sensors, charging, ignition and starting circuits, and are the first wires to cut and eliminate. The next group to eliminate are wires which are part of your dual sport circuits but are not necessary to it's operation. These will be wires leading to the old instrument panel such as turn signal arrows, high beam indicator, dash panel lights, etc. Some of these wires will be color coded the same as the circuit wires you need. You will have to use clues as the type of connector at the end of these wires to judge whether to cut or keep it. For example, if the wire terminates in a bulb holder such as used in an instrument panel, you can cut it. Remember to test your DS system after each cut and splice back any wires that interrupt one of your components.
Rough fitting the harness to the bike:
When you have thinned out the wiring harness and have only wires needed to operate your dual sport components left, it is time to move the wires to your dirt bike and begin fitting and adjusting the harness to it's new setting. Obviously, the fuel tank, seat and original headlight and tail light will have to be removed and you must have installed the brake light switches, turn signals, head and tail light on the bike before this can be done.
In most cases you will likely find the donor bike connector wires are longer than needed on the dirt bike. so you will shorten them to fit. When you need to lengthen wires to a component by splicing in a new segment, try to use the same color wires as were used on the donor bike. Consistent use of color coded wires makes future diagnosis and repairs a lot easier.
You may also find it necessary to change a few connector plugs to match those on the component they power. The rule here is to use female plug ends on the hot side of the system and male plugs on the component side to avoid accidental grounding of hot wires. Be sure to solder any wires you splice and wrap the splices separately with electrical tape before final wrapping of the harness.
Powering the new harness:
With the modified harness on the bike; it's time to attach it to the battery terminals and power the system up. Of course you won't attach it directly to the battery, you will use a switch, preferably your ignition key switch, to turn power on and off. I used the DRZ tail light wire, which is turned on with the ignition switch, to operate a relay feeding power from the battery to the donor fuse block using 14 gauge wires. I considered using the DRZ headlight wire (16 gauge) to power the new harness and components but with more components you need heavier gauge wire to supply enough current and avoid possible over heating or fire from small gauge wires.
A relay is a device that transfers the needed amount of current thru properly sized wires but needs only a small amount of current to activate the electromagnet that relays power from the battery to the fuse block. You can purchase a 30 amp relay used for fog or driving lights at NAPA and most other auto parts stores for $4. Using a relay activated by your key switch assures that light system and accessories have enough current to operate safely and that they only work when the key is turned on. The fuse block feeds the lights and horn just as it did on the donor bike. You should even have a couple of extra fused hot wires left over to use for accessories such as a GPS or heated grips.
Final testing and wrapping the harness:
When the wiring harness is in place with all components attached you should test each light and switch for proper operation, and double check every connection and splice to see that it is secure and safe from being separated by normal operation of the motorcycle. Turn the handle bars lock to lock as the turn signals are operating. Test the horn and brake light at the same time. Bounce on the seat, lock the front wheel and tire and compress the forks repeatedly to be sure that wires aren't stretched so tight that they can pulled apart by these actions or are rubbing on the frame or other parts of the bike so they could wear through to the bare wires and short in time.
When satisfied that the new harness and components work properly and are safe, wrap the loose wires with electrical tape. In areas where the harness is likely to rub on the frame or forks, enclose it in a protective sheath such as you may have removed from the original harness. You can also use a wiring loom cover (available at auto parts or trailer supply stores) for that purpose. Wrap the cover with electrical tape as you did the loose wires. Replace the fuel tank and seat you're good to go.
Before you go to the DMV for your plate, I recommend running the bike over the usual kind of off-road terrain you plan to use it on for a few miles as a final stress test. Better to find and fix problems early than after you have a plate and hit the trails 40 miles from home and there's no pickup truck to haul you back. Next stop should be the inspection station (in Nevada) and then on to the DMV for a VIN check and your license plate. After that, remember to keep the rubber side down.


Recommended Comments
There are no comments to display.