Search the Community
Showing results for tags 'CylinderKits'.
-
NOTE: This How To white paper is just a guide; it does not replace a service manual, general mechanical knowledge, specific motorcycle repair experience and good old common sense. With the proper tools, some general experience and this guide most users will be able to successfully remove and install a NEW DRZ TOP end (piston, rings, cylinder, as in a new off the shelf big bore kit) and if required replace shims to adjust the valves to service specifications. As always if after reading though this guide, you do not feel capable of performing this maintenance task, STOP, ask questions on the forum, take pictures of your point of confusion and get your answers before you start. This write up does not currently address the additional steps required to install new set of rings /piston in a good condition used cylinder. Who should do this job?: Well anyone with a basic bit of mechanical knowledge, some common sense, the basic tools required, has the time and patients to stop when confused on a step, missing the right part, tool, or piece of knowledge, and has a service manual on hand (for this task, any DRZ 400 OEM service manual will do, any model, any year, quick search of the internet will get you what you need). For the first timer, plan a weekend. Start the project so you have at least one day extra in your scheduled time line with tool and parts stores open.. You will need something Tools: Only what I consider basic tools are needed for this task, of course one person’s basic set is not always the same as another's. So read though the article, look at the procedure in the service manual, and consider your available tools.. Since you are reading this, I’ll assume you have not done the job before. As such, there is sure to be a tool not mentioned that would make the job easier, or even required. Feel free to send in your “Have too’s” and we will add them. So what do you need? We start with the word quality, tools, parts, etc..ie if it came from Harbor Freight likely damage to a fastener or two should be considered normal. 🤣 An assistant is often helpful; an extra hand, an extra set of eyes to see something you missed, someone to use the digital camera. One of your best “Tools” is the digital camera. It can be your best memory of how a part fit, fastener went, remind you of an install sequence. Take more than you think you need you never know which shot or angle will have that one piece of info you will need later. Second best “tool” is the zip lock bags and marker… Buy the cheapest bags you can find,, often you can buy a hundred or so for just a few $$ (the one time I will shop at someplace like Harbor Freight) Metric socket sets and ratchets (1/4”,3/8” drive (6 point preferred), wrenches, hex key wrenches/sockets, torque wrench (having two; an inch pound low torque under 300/inlb and higher torque up to 75 ft/lb+), breaker bar, razor type scraper W/ extra blades (plastic scraper is safer on the head and cylinder surface ), wire brush (not to be used on any aluminum surface gasket surface), valve shim kit or access to additional size shims, feeler gage, long needle nose pliers, magnate on a extending stalk, wire and zip ties Supply's: -Assembly lube -4 qt oil (2 qt can be basic oil, the other two what you normally run for a full service interval) -2 oil filters (at least one a paper type) -Coolant -Anti seize (very small amount needed for the exhaust fasteners, you can often get a 5 gram one time use "pouch" of this at a automotive supply store) - Medium Strength Anaerobic thread Locker (Loctite Brand 242 or Permatex "blue")My basic rule for fasteners.. if it rotates it gets thread lock, if it can vibrate loose it gets thread lock, If it is subject to corrosion it gets thread lock. The assembly, fastener, and it’s use directs the type of thread lock used. High strength, Medium, or Low. Wicking grade for assembled parts, or just thread sealant.. There are many options. -Three Bond 1194 case sealant or RTV type automotive silicone sealant (very small tube needed, you will only use two small pea sized spots of sealant) -Paper towels and lint free shop towels, As you will be opening your engine up, the first step is to thoroughly clean the bike; the frame above the engine valve cover, head, case and left side cover will be open and accessible to dirt and other debris. Clean, degrease, and start with a clean work environment. Time to dig in You’re doing a top end install, OEM or Bigbore so let’s assume you have bought a kit, and have a base gasket (single or three ply), head gasket, new or refinished cylinder, new correctly sized piston, pin, pin locks, rings. I prefer to leave the oil in the engine, so it might carry away any minor dust or debris and coolant that get in while performing the install. You can do this step at the start if you want, but I would suggest you wait unless you have a clean room to do the build in (ahhh someday I'll have another clean room just for engine work....but not today) You will need to remove the seat, shrouds, and tank. Drain the coolant(See Tech article "Cooling System Service" as needed) Something not required but I’ve found helps with keeping coolant out of the case when you pull the head..is to use a shop vac to "vacuum" the cooling system at the head inlet. Then again once the head is off, vacuum around the cooling passages of the cylinder before you remove the cylinder. Required? NO, but it seems to help. And coolant in the case is another reason I drain the old oil after assembly is done. Remove the fan and horn (if used) then radiators...Again not required, but for most it makes the job easier and with less chance of damaging the radiators as well as it provides more working room. Remove the carburetor, exhaust system and top engine mount. If you need to know how to do this, please refer to the service manual and or other help threads for these items. Now that things are stripped away, clean the engine and frame area (again) the less chance of dirt getting in the better. Disconnect the spark plug wire and loosen the plug, leave it in place to assist in keeping debris and loose fasteners out of the engine. Remove the three breather hoses two on the valve cover top and one at the back of the cylinder and zip tie them out of the way. Congratulations, your DRZ is now set up for the top end to come off. Off With It's Head Remove the valve cover. Don't lose the rubber gaskets under the valve cover bolt washers (remember those zip lock bags we spoke of ???) The valve cover gasket is rubber and re usable. Rarely are they found degraded or ruined in a job like this.. Upon install, you only need a pea sized dab of Three Bond or RTV silicone at the bottoms of the half moon part of the gasket. Remove the timing plugs from the stator cover, using a 17mm socket rotate the engine to TDC (just get it close, with the cam lobes not depressing the valve springs) (see Tech Article "Valve Clearance Check " for more information) It truly makes no difference if the engine is at TDC at this point, as the cams are coming out and will need to be re timed to the crank.... Just make sure that before you loosen the cam cap bolts, the cam lobes are not depressing a valve. Remove Cam Chain Tensioner. If using an ACCT (shame on you ), relieve tension on the ACCT (cap and spring '03 and later, screw and then use a small flat blade screw driver to retract the plunger on prior years) prior to removing the two socket head cap screws and the CCT assembly. Remove the Cam Chain guide and the cam cap fasteners following the TQ sequence found in the service manual. NOTE: Take note of the different length cam cap bolts. You must re install them in the right locations. If you put a shot bolt in a position requiring a long one, you will pull the few threads that short bolt engages from the head. Requiring a thread repair before you can finish the BB install... Be careful not to drop the dowel pins used to locate the cam caps into the head. Sometimes they stay in the head, other times the come out with the cam cap, and occasionally, they do nether and fall off as you remove them... (yes, you can remove a DRZ engine from the frame , turn it upside down and shake it till a part falls free.. but it is not a recommended method 🤣 ) Remove the camshafts one at a time, they need to come up and towards the center of the head, the chain can then be removed from the sprocket. Use a long spring, piece of wire or zip tie to hold the chain up and secure as you remove the second cam.. It is not the end of the world if the chain falls down... you can easily retrieve it.. .. Just an added step. BUT keep in mind, if the chain does fall down in the motor, do not rotate the crank, the loose chain will bind up and damage the cases. Loosen the two nuts at the base cylinder (lower red circle) Remove the two bolts at the base of the head. (Upper right side red circle) Loosen the four cylinder head bolts using a sequence and procedure located in the service manual and then remove them. Notice the washers under the head bolts have a flat side to them. The flat side faces the head. NOTE: some of the Big Bore kits included copper washers for use on the head bolts; throw them away, re use the OEM steel washers Remove the cylinder head; if you tied up the cam chain, having a helper pass the cam chain through the head and wiring the cam chain back up is useful or just let it drop it's not going anyplace. Like the cam caps, the head has two hollow dowel pins, note the location and be careful not drop them in the engine. Set the head on a soft surface, wood, cloth, plastic. If you turn it over, the valve buckets and shims are likely to fall out. So either set it cylinder side down on a soft surface, or remove, bag and tag the buckets and shims for what position they came out of. You can now remove the front cam chain guide, and the two 10mm nuts at the base of the cylinder. Time to get that pesky cylinder off. Pull up on the cylinder about two inches, place a non lint rag around the connecting rod to secure the piston and to prevent objects from falling into the engine, then remove the cylinder the rest of the way. Remove the piston pin circlip using a small screwdriver or pick and throw it away so you are not tempted to re use it when one of your new clips gets lost and it's Sunday, and you want to ride..... This is where patience comes in. Push out the piston pin from the opposite side. Congratulations, your bike has been disassembled and is ready for the next step.. clean up.... Prep and clean up for the new TOP END Remove any remaining gasket residue from the head and case. Break clean and a soft rag will work, a hard plastic scraper helps.. a metal scraper can help or ruin your head... so if you use the razor blade type scraper, well just be careful. At this point I'll mention what you should have already decided,, Head and valve work... If your using a high hour or unknown condition used head.. it is strongly recommended you send it off to have new valves, springs and locks installed by a competent shop. OEM parts are fine in a stock to moderate build, if your wanting better stuff, seek the advice from a well known and respected shop. Prior to cleaning the head or sending it off, remove the valve buckets and shims (if not done already) place each in its own zip lock, mark it left or right, EX or IN. Clean the head bolt threads in the case and on the head bolts with a thread chase, wire brush and some solvent. Checking the ring gap I hesitated at adding this step to the article. 1st- because 99% of the time in a Big Bore Kit, it will never be needed. 2nd- because if the gap is wrong there is not much a home user can do except send back parts for correct replacements (filing rings for correct fitments is not a DIY first time builders task), 3rd- ring gap is different by manufacture, type of ring and piston material and several other tuner related opinions and ideal rule of thumb is .003-.004" per inch of bore. And lastly it is a more advanced procedure that if not done right can damage the rings and or result in errors of measurement.. Which will only confuse the end user and cause its own problems. Therefore, with that caveat; I do suggest checking the ring gap prior to installing the kit. You will need to know your ring and piston manufactures suggested ring gap and a high quality feeler gage set. Using the piston to square the rings in the top 3/4" or so of the cylinder measure the ring gap with a feeler gauge. NOTE: this picture is for illustration only. This is not DRZ cylinder and the ring is much further down then the recommended 3/4" If it falls in your manufactures specs, assemble and go. If it does not, but falls in the .003-.004" per inch of bore... I would suggest leaving it. If it's still measuring outside (tighter) then specs.... Take a break, double check everything is clean and try again... If still off.. call the supplier and get there recommended course of action. Filing rings is highly unlikely to be needed.. if yours simply do not fit it's more likely you have the wrong rings. talk with the manufacture or suppler before attempting to make them fit. Putting it back together Ok so everything is clean, you have your new cylinder ready, all cleaned up with hot soapy water, dried, piston and rings have been confirmed as correctly fitting the cylinder, gaskets ready,, Oh ya...gaskets... so what about this copper coating you hear about??? NOT NEEDED in most builds.. it is a band aid if used with damaged, dirty or incorrectly fitted parts.. .... BUT, copper coating the head gasket has proven useful in avoiding compression leaks on high CR builds (above 13:1) or larger then 94mm bores.... The common product is Permatex " Copper Coat High Temp Gasket Prep " spray. Use two light coats and let dry over night. You’re not going to hurt anything doing this on an otherwise properly prepped engine, it's just not really needed unless your upping the CR to or above 13:1 or have a larger then 94mm bore. Back together we go Base gasket: Two choices, single layer as comes stock on the 12.2:1 compression DRZ E, or three-layer gasket as comes stock on the S & SM. Each layer (gasket and spacer) are approximately .010" thick. While piston to head deck clearance is always, a concern when modifying any engine, all DRZ engines using a standard stroke crank and piston deck height can safely use a single layer gasket. Many BB kits, and replacement top end gasket sets will come with a three-layer gasket regardless of what model bike it was sold for. If yours came with a three-layer, and you wanted a single layer, no issue, you now have a spare. The three-layer gasket is held together with rivets. Simply snip off the rivets or drill them out, separate the layers. Top and Bottom are usable base gaskets.. the center layer is a just a spacer.. you can throw it away, it will not work as a gasket. Install of the piston can go one of two ways.. Install in the cylinder on the bench, then lower the assembly down to the rod and install the pin and circlip... OR install the piston on the rod, then slide the cylinder down onto the piston and case. I prefer the second method, others like the bench piston install. Using either method we recommend a "dry piston install" that refers to no oil on or near the rings. Place a thumb print sized oil spot on the piston skirt and lube the piston pin, that is it. Once you decide on a piston install method, degrease the rings and install on the piston, index them according to the diagram in the service manual. Install one piston pin circlip in the piston (on the side you will not be working from) Piston Ring install.. GENERAL Guidance -Grey thicker ring goes in the top groove. -Darker thick ring second groove. -Thin rings and expander go in third groove, 1 thin ring on top, 1 on bottom of the expander, Place expander in grove ensure the ends of the expander ring MEET.. Not overlap..place a thin ring on top of the expander, and one on the bottom. - All ring ends off set, but so long as they are not closely aligned, don’t get worked up and making them some perfect xx deg apart. - All markings face up. The spring wire circlip (red arrow) is used to keep the piston pin in place. A new circlip installed correctly in the piston pins groove will never causes a problem. However, if incorrectly installed, severe cylinder damage can result. Re using a clip, damaging it up install or not installing it correctly will likely result in something like this. A way to install the circlip is to position one end of the clip in the groove with the other end at 30deg. past the cut out (blue arrow). Now, using a very narrow flat blade screwdriver (I have one that I rounded over the sharp edges on, and use just for this purpose) lever the clip inward and into its groove. You will hear it snap into place if done correctly. Note: just in case you slip, cover the area under the piston's skirt with a rag to prevent the clip from falling down inside the engine Remember NEVER reuse a circlip and listen for the snap as the clip expands into its groove AND verify it visually on BOTH sides! Install the base gasket, piston and cylinder in the chosen method. Install the head gasket, and head (don’t forget those dowel pins). Using clean lightly oiled head bolt threads and the OEM steel washers, with the machined flat side toward the head, TQ the bolts following the sequence found in the service manual, with a final torque of 43 ft lb (yes that is higher then what the service manual says, we believe the misprint in the manual of 34 ft lb is just another mistake found and uncorrected in the written service manual) Notice we recommended using the OEM steel washers. Some of the earlier BB kits came with copper head bolt washers. DO NOT USE THEM. Re use the OEM steel washers. Check the valve clearances once the head is on. If the same cams were re used, likely nothing has changed. But better to check and not guess. Reinstall all the other components removed previously in reverse order. Drain the oil and change the filter for a new paper one. I prefer a paper disposable filter for first run use anytime the engine is opened. Foreign derbies that have gotten in are tossed with the paper filter that way. If you use a Stainless Steel filter, getting small bits of crud, gasket, dirt, what have you out of the filter medium are a pain and can result in damaging the filter medium. First start, Leak check and Break In Once you have it all buttoned up. Resist starting it till your ready to do the break in..... But when ready..Give it a start, while it's warming up for just a few seconds (just till you can feel some heat in the cylinder) do a good inspection for leaks. If none, begin your break in procedure. The gold standard is to do this on a Dyno where you can control all the variables. As most of us do not have a Dyno in the garage, we do the best we can on the street or track. How you break it in is a subject of debate. I'll point out ONE method that has proven to work well, shown no decrease of longevity over all in the engine and has proven many times over to result in very low (3% or less) cylinder leak down numbers. You need a riding area where you will be able to put the engine under full power spurts, no concerns for traffic, stop lights, Law enforcement officers... 🤣 After a warm up & leak check. Ride it, full power open the throttle hard in 2nd, 3rd, 4th gear, no over revving, no sustained RPM limiter runs.. The idea is to fully load the rings under power and deceleration. This is NOT the "ride it like you stole it method" you may have read about. None of this is new or groundbreaking information; builders have done this for years. One builder decided to make a web page on this method and posted some about his results.. Have a look MotoMan do your research, and decide what break in method is your choice... Then go ride Once you have completed your first check ride, bring the bike back in to the work area, do a thorough leak check and double check for all fasteners to be tight. Change the oil and filter, using your standard type, brand if different then the suggested short use first start oil and filter. Check the frame filter screen as well, as it will trap large bits of crud if they somehow made it in your engine. Congratulations You just installed your new big bore kit, perhaps you added some Hot Cams now go ride it Thanks for looking, hope this helps folks along the way. As noted at the start of the article, this write up was not intended to be a standalone step by step walk though. It is expected that the viewer has a basic understanding of motorcycle mechanics, tools and their proper use and has an OEM service manual on hand for reference. On Line parts fiche are also very useful. I will edit this article as users find a particular trouble spot they wish help in. As always, if you have a picture that may assist another with a step or procedure shown, send me a PM. Likewise for any errors you might find. This article like all others I have written is biased... It is written as I would suggest doing the task. That does not make it the only way.
-

1 review
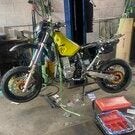
295cc big bore with NSC plating. Came with Wossner forged piston. Chose the pump gas/more power everywhere porting package. -
0 comments
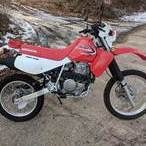
Reliability like no other! Dual-sport 1997 Honda XR400R with Wiseco 440cc big bore kit. Thousands of miles on and off road. -
0 comments
-
0 comments
-
-
0 comments
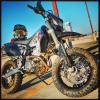
Permanently in motard mode. Daily commuter. Fun to ride. Does pretty good wheelies. -
-
0 comments
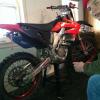
Solid bike, fun to ride. -
 How to properly measure a cylinder for a top end rebuild. This applies to 2 and 4 stroke motorcycles. With just a few simple specialty tools you can measure your cylinder and small end rod to evaluate if your parts are usable or need a trip to the machine shop. This video will give an overview of the tools required and how to do the job. First and foremost a service manual for the bike/engine is required before attempting. This is just one of many measurements that must be done before ordering parts for a top end rebuild.
 -
0 comments
-
0 comments
powerband smacks hard, good bike -
0 comments
Bought an old race quad and redid it. Ended up buying new plastics, so there are pics with it yellow, some red, and all red. -
0 comments
Fun bike! -
0 comments
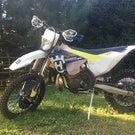
Love it, it gave me some problems before the rebuild but now it's better than ever. Big bore gives it crazy bottom end and the cam makes up for that loss off the top. Awesome bike all around. -
0 comments
Fell in love with her -
0 comments
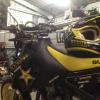
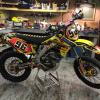
Great bike, has 77mm 277cc kit in it. -
-
Hello to all TT's I have created a page on facebook called "Clean Rebuilds" because the garage section of TT is not available. I have posted a few videos and pictures of bikes I am currently rebuilding. I am NOT selling anything here and this is NOT a business.There has been a bit of interest so I thought it best to point out a few things. I am not a qualified engine rebuilder or mechanic, and this page is NOT a how to "step by Step" guide on engine rebuilding and reapirs. It is purley informational based on my experiences. I am not seeking power or prestige and certainly do not profess to know everything. This is just a hobbie for me. My motivation behined this page is that I will be learning as I go and I hope you can enjoy and benefit from some of my experiences. I have been working in and out of the automotive indusrty for 20 years. For the last 10 years I have been working as a sales / estimator and engineering design, for our family engineering buisness. Currently alot of my work is commerical heating, ventilation and food drying processes. I am also not qualified here but have gained skills along the way. I have only recently got back into bikes after a long stint of night life work. Everything I repair is information gathered from either the internet and other engineering books but mostly I buy and work from the specs in the aftermarket repairs manuals. I hope you enjoy the page and can benefit from some of the tools I have made and lessons I have learned along the way. Thanks and have fun! https://www.facebook.com/CleanRebuilds
-
i have a '02 cr80r that i am thinking of changing the sprocket size on ,the bike has an insane topend which is absolutely amazing but i would like to be able to get just a bit more torque out of it on the bottom end . i am leary of the bb kit and have been told that simply changing my sprocket size will do the same thing what are the best sprocket combos to acheive max efficiency
-
Lets hear from folks who have this kit ... what other mods did you make? Do we have to run race fuel? What exhaust did you use with it? What ignition? etc? Pics of bike? Any help is appreciated thank you, Otokiak Rankin Inlet, NU CANADA
-
i am just wondering if anyone out there has big bored a 250x and if any one has put in a hotcam stage 2 cam also. also how much power this resulted in. thanks! http://www.crfsonly.com/catalog/product_info.php/cPath/26_110/products_id/1828
-
I used to ride almost only sand dunes so I am coming off a 450. Moving to a 250 now that I am riding single track more and just looking for a more agile bike. Yes the 2015 is powerful for a 250, but what if I want MORE out of it while still keeping the handling characteristics. Please give me some suggestions for power modifications, best bang for the buck! The bike will be in everything ranging from tight single track to open desert to MX track. Riding elevation ranges from 5000 to 8000 ft if that affects any decision when it comes to engine modifications. Here's a picture before the bike break in just to excite some people.
-
I'm curious as to what your fondest/ most memorable experiences with your big bores are. Now, I'm not talking about your 144, 265, etc. I'm talking about the bikes real men ride 😉 CR500s, KX500s, and what-have-you. Yes, being roosted by one does count as an experience Mine would have to be all of the conversations that mine has started while I was at the track, as well as when it threw me 8 feet when I tried to start it.
-