Search the Community
Showing results for tags 'DRZ'.
We're rebuilding the search index for faster, better results. Current results may not be complete.
-
I have an idle issue I just can't seem to solve after having the carby apart several times. I finally gave in and orders an O-ring set for the middle of the carby but am having an issue getting th body separated on account of the epoxy joining it together and I am worried I might crack of break something if I use too much force. I've removed the 4 screws. Does any have any tips for separating the halves on the carb body?
-
when i ride my drz400sm it feels like im bouncing i went and got my wheel balanced then remounted it and it still bounces played with the rebound adjustment then tried it again and nothing again now im out of ideas please help lol thanks
-
DRZ 400 Swingarm Pivot Bolt Removal Tool In Aug 2018 I bought a 2016 DRZ400S which had very low mileage. In the fall I decided to pull the Pivot Bolt for the swingarm, just on spec….yep it was corroded, but saveable. I used the concept from “2 Wheels” that was posted in the FAQ area, and adapted it to make it more effective. His concept used a section of pipe, washers, nuts, and a 3 foot section of threaded rod. As is indicated in the FAQ article, the limits of this puller is the strength of the threads on the rod, as once you reach the limit, if the bolt has not moved, further tightening simply strips the threads. His technique then involved hammering on the other end of the rod, which is a challenge to do without damaging things. I adapted his idea as follows: - using the same rod, - locking two or three nuts on the chaser end that will follow the bolt as it is pulled, and rounding them on a grinder to a size slightly smaller than the pivot bolt - taking the 3 pound slide weight off my slide hammer and putting it on the other side - using multiple washers and 4 nuts locked together on the end of the rod. The technique: pull the rod through the pivot bolt until the chaser nuts are solidly in contact with the threaded end of the pivot bolt, then slide the 3lb weight on, then multiple fender washers, then 4 nuts. I then started a series of blows with the 3 pound slide weight against the washers/nuts on the end of the threaded rod, to pull the bolt. This allowed for significant impact force to be imported on the pivot bolt with no issue of missing/damaging things, and it completely avoided the stripping the threads issue as the nuts are not turned and are locked in a combo of 4 together to spread the force. My clever plan, if the normal grade threaded rod could not hold the stress was to get a rod with a much higher SAE rating and do it again…but I was fortunate and the stock rod was enough for me. Here is the image of the “chaser” end, which is two nuts locked together and ground down on the grinder to a diameter just smaller than the pivot bolt. And here are a couple of images of the slide hammer or puller side: And Finally, here is my pivot bolt after one very short season and no real mileage!!!!
-
I would like to claim that this is the “ultimate” installation guide, but there are too many really smart guys out there, and they will have observations that I missed, so I restricted my bragging in the title. Before doing the install, I researched this forum and online quite a bit, and did not find all the info that I needed, hence the motivation to pay it forward to you. First, how to buy the kit: I recommend that you call Trail Tech and order directly from them, or at least confirm exactly what kit you need. The engineers at Trail Tech have made a superb product, and it can be installed on just about anything except a horse, but you need the correct connectors and sensors to get it to install on your specific ride! I got kit 752-113, and an extra set of wheel magnets. (In my case, I have two sets of wheels (knobbies on one and street tires on the others) so I needed two sets of wheel sensor magnets.) Next, Trail Tech has a fancy shroud, that custom fits the Vapor display, and replaces the indicator lights for turn signals, high beam, overheat, etc. I test rode a bike that had these and found the lights to be too small and dim to reliably warn me, so designed my new dash to incorporate the OEM four light warning cluster, which I kept. The instructions that come with the kit are pretty solid, and I won’t repeat them here, only the observations that I made. 1. Power: You can use the White 3 wire plug (that you will find in the rat's nest, connecting the OEM speedo) as follows: cut off and insulate the orange lead, use the red lead for power (put in an inline fuse) for the unit, and the black lead as your ground. Yes, this means that the unit is always powered, but it goes totally dormant within minutes of being stopped, and consumes approx zero power when running. Some folks choose to find a switched power source so that the unit is unpowered when the key is off, this is unnecessary. . 2. Temperature Sensor: the kit comes with a variety of methods of getting engine temperature information. It has an insert that can be put into a rad hose line by cutting the hose and putting on two hose clamps. This would be a real pain, and will give you issues with the limited space in which you have to work. The kit also includes a temperature sensor that very easily and neatly bolts into the drain plug hole on the top of the left rad……yup, you got it, go with the drain plug option. Now how to set it: the cooling system has two temperatures of interest: - the water temperature sensor for the Fan cut in is located in the left rad and is visible in the left photo two below (sort of light blue resin to seal the wires in it). It is set to turn the fan on at 205F (96C in Canada eh) and then off at 196F (91C) as the engine cools - not in the photos: the overtemp sensor is in the right rad, and it triggers the OEM red overheat light at 243F (117C) So, I chose to set my Vapor to have the yellow temp warning light on the vapor to come on at 94C so that it would illuminate shortly before the fan cuts in…sort of to draw my attention to heat. I set the Vapor to have the red temp warning light come on at 115C which is lower than the setting for the red OEM warning, but the OEM warning is sensed in the right rad where the hottest coolant is found, as it is there that the coolant first arrives when it exits the engine. I may set this lower to give me a mid-way warning, before I actually get the red OEM warning light. 3. Tachometer: the diagram and instructions are great. They recommend wrapping the sensor antenna wire (red) around the spark plug lead “5” times. You are creating an antenna to pick up the signal that is created when the plug fires; I recommend you wrap it 7-10 wraps. The more wraps, the better the signal the vapor computer will get, and the greater the likelihood you will have a good reading. As this area gets hot, I recommend you attach this red antenna line with a couple of zip ties. 4. Speedometer: the instructions are superb. I found that the magnetic brake disk bolt option worked easily, and is unlikely to come unglued. The pickup sensor that detects the passage of this magnetic bolt on each revolution of the wheel is shown mounted on the front of the front fork tube…DON’T DO IT! I assume you are putting this on a DRZ-400S” because you intend to ride it in the dirt and trails…and those bushes/branches will strip off your sensor on the first ride. With a little experimentation you can mount it on the back side of the fork tube where it is very protected. 5. Front Wheel Speedo Assembly options: Finally, you are left with the choice of what to do with the old speedo assembly. Some folks apparently plug the hole in the speedo hub so water won’t get in, and continue to use the speedo hub as a spacer (with those gears whirling around and the seal wearing…). My choice was to remove the speedo hub altogether, order another front wheel left side spacer to use on the right side, and order and install another left side hub seal and install it on the right side. This gives you identical setups on both sides, takes the old speedo hub and gears out completely, and gives you a more waterproof setup. 6. Data Setting: There are a few numbers you need to setup the computer so it will work for you: Wheel Size: start with 2110, and adjust when you calibrate. This is the nominal circumference of the front tire, and should represent the distance travelled in one revolution of the tire. PPR (pulses per revolution) set this to “1”. Yup, I know that this is a four stroke, and only has one power stroke for each two revolutions….but the engineers that designed the bike figured out it was way easier (I mean WAY easier) to have the spark plug fire every revolution, and when it fires on the top of the exhaust stroke nothing happens…..so, the plug fires every revolution and hence the number you need is 1. I have already suggested some settings for you to try for the temperature lights, and leave the RPM warnings to your own tastes. 7. Odometer: If you are as detail oriented as I, you will want to set the mileage that is already on the bike into this new odometer. All you need do is contact Trail Tech and they will send you the instructions to do this. 8. Dash : yes, you will need to make your own dash to mount this new kit on. I went to a hardware store and got an aluminum door kick plate, and made a rough template, and then made a better one, etc. til I was happy. There are enough threaded holes in the upper triple clamp to offer you a variety of ways to bolt a mounting bracket on; I used oversized holes and got rubber grommets from a hardware store to insulate my new dash from the worst of the pounding from the big thumper and the rough road. Hope these hints, in addition to the very good instructions that come with the kit, make your experience smooth and easy. Good Riding!
- 22 replies
-
- 17
-

-

-
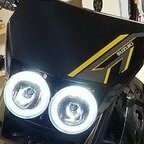
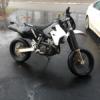
I bought a 2018 DRZ 400SM last month off the floor. I have always wanted this bike and saw it as I walked by to the parts counter. I left the store then turned around and walked back in and bought it! A little about myself, I have ridden dirtbikes and ATV's my entire life. I also worked at a bigger shop as a "C Tech" for 2 years and I work on all my own stuff. I instantly took the new DRZ home and started to order parts, Fender eliminator kit with smoke tail light and integrated turn signals, front flush signals, the "angel eyes" head lights off amazon and took off the warning stickers/ reflectors. The bike didn't have enough power for me and I could tell it was running fairly lean at the top end. With 200 miles and its first oil change I decided to buy a full Yoshimura RS-2 carbon fiber, JD jets and do the 3x3 (ended up doing 3"x 3.5" to make it centered). After installing the carb I noticed the filter side boot has what appears to be chunks missing where it attaches to carb. At first I was thinking from moving the carb back and forth working it out maybe it caught the edges and sliced pieces off. But those boots in my experience are pretty tuff and made with good material. I have rejetted dirt bikes and such a lot and never seen a boot have what looks like damage like that from taking carb on and off. I started to worry about pieces inside the intake and possibly being forced into the top end. So thought I would search around and see if the boot is just like that. I am probably going to take the carb back off and make sure but would like some input. Another aspect is that I didn't see any of the pieces outside the carb or in the area where I was working. So could all pieces have went into the intake and none fallen on ground? doesn't seem like that's possible. I will attach some photos, the one of bike is before exhaust, still waiting for it to arrive. Thanks fellas!
-

bearings Trashed the gearbox, should I replace main bearings
That Dan posted a topic in DRZ400/E/S/SM
So after grenading my gearbox, I’m busy rebuilding the bottom end and was contemplating whether to replace the main crank bearings. Motor only has 7000 miles on it. Is it false economy to not replace the bearings? Both run smoothly with no perceptible play. Out of interest, it seems like the cause of the gearbox failure was a shift fork seizing on fifth gear. Fork was badly worn radially and showed significant blueing. -
Hey Guys, I recently bought a 2003 DRZ400S and thought it would be a good idea to check the valves clearance etc . I timed the engine on TDC with the magneto mark aligned as per the manual but I find the cam timing slightly odd. The arrows pointing upward are on the 1st and 15th pin as they should but with the magneto timing mark aligned they are not perfectly straight. Same goes for the arrows that should be parallel to the cylinder head casing. Is this normal or should they be absolutely perfect ?
-
I decided to replace my factory tool kit bag with a waterproof pelican style case. I did this for a couple of reasons. The case is waterproof, lockable and provides more space than the factory bag. I can keep additional items in there like ownership and insurance. Multi-tool and JB weld along with the factory tools. I think it looks cooler too, but that's subjective. The case I used is a Seahorse SE 56. They come in different colors. They're pretty affordable. The ridges on the bottom of the case line up with the bolt holes exactly. You pretty much need to drill two pilot holes right in the center of each ridge and then use a different bit large enough for the factory bolts to fit through the holes. After that, just go to the hardware store, buy two new bolts that are a bit longer than factory with two corresponding flat washers and a couple of rubber grommets. You can reuse the factory nuts (take them with you to the hardware store along with the bolts to find the correct longer bolts) Aside from that, you'll' need to buy two rubber grommets to act as spacers between the fender and the case. You should be able to source this stuff for less than a few bucks. Slide the bolts and washers through the inside of the case holes you drilled, place two rubber grommets on the fender around the factory holes and slide the bolts through the factory holes and the grommets and button her up. The case should remain waterproof since the inside of the case is all rubber. The washers and bolts snug up against the rubber and maintain the seal. It's a pretty simple mod and doesn't add much weight or cost. Let me know if you have any questions.
-
The coast enricher effective richens the fuel mixture on deceleration but cutting air and that prevents backfiring. A perfectly working coast enricher is a good thing and has no performance down sides. However over time the coast enricher parts wear, hoses leak and low speed jetting goes to hell. A properly tuned pilot circuit does not need a coast enricher, factory leaness was the reason for it. Many bikes of later years or other brands did not come with the enricher nor do most of the aftermarket supplied FCR's... Removal of the coast enricher is simple .. Remove the nut and two hoses in red circles Connect the two remaining nipples with the proper sized hose and clamp them down with zip ties or clamps Plug the no linger vacuum port on the cylinder head with a cap And your done ..If you have significant back firing at deceleration now, most likely your pilot circuit needs adjustment. a year or so down the road, if you think you have a vac leak...check that rubber cap you put on the cylinder head port..the rubber caps commonly found at auto parts places do not last very long in the heat and operating environment. If you can source silicone vacuum caps, even better.
-
The FCR39 be it older slant or newer MX version is often reassembled incorrectly due to incorrect pictures used on Suzuki OEM parts pages on line. The part, called a "valve" in the Suzuki OEM parts pages, or vacuum release plate in the Keihin manufactures pages can be physically installed upside down and cause all manner of runability issues. Correctly installed as seen in the right hand two pictures, the flat end with small notch is supposed to be pointed down.
-
Hey guys, I think its time to ask a 2018 FRC MX 39 question. I know theres a thousand discussions on this (But most prior to 2011 and its 7 years later... just saying) Do you leave the 100 Pilot Air Jet in or not??? Look it up and you get different answers (Both with good reasons). Just want to know leave it in, and why? Or take it out and why? My Elevation 1,200ft Temp = Pennsylvania (Means it could be 80 degrees today and 40 degrees tomorrow) My Mods MRD Exhaust 160 main jet 45 pilot jet EMN needle clip 3 200 main air jet 100 pilot air jet 2 turns fuel screw o-ring mod
-
Hello, I need your help, FAST. … Thanks in advance. Please check out this ad. … The seller tells me the third owner but the bike is only 2 yeas old and the miles are very low. https://austin.craigslist.org/mcy/d/2016-suzuki-drz400sm/6604761265.html … I cannot think of any reason that a bike would have 3 owners in that short time. … The current owner swears it's all good. … One other strange thing is that it is claimed to have the 3x3 mod and to have been jetted but it has the stock exhaust, which would restrict and nullify these mods. … He is supposed to call me back with the VIN#, later today. … USED DRZs are as rare as hen's teeth, in this neck of the woods and I want one. … The seller also has a foreign accent, which makes me think he is some sort of "trader". … I am also worried about some sort of VIN#-bait-n-switch scam … Note that this ad was posted more than one week ago, so, no other buyers, in that time. Any thoughts or advice ? … Should I bail ? … I need to make a decision, today. … How do I verify that everything is kosher? … Are there any known scams where they switch the bike or the paperwork ? … Where else should I post this request for information? Thank you all for your responses. https://austin.craigslist.org/mcy/d/2016-suzuki-drz400sm/6604761265.html
-
I have a 2014 DRZ400SM with about 28,000 miles on it. I have had it since last summer. Since then, I have done the 3x3 mod with a JD jetting kit and added a K&N Air filter. I have been running a 155 Main Jet, the Blue Needle with the clip on the 3rd slot, a 125 pilot jet, etc. Basically, exactly as recommended by JD. The bike was running fine until recently. It started sputtering, backfiring, and missing around 5k rpm, especially in higher gears. I thought maybe this was due to the weather warming up, and I was too rich. I tried swapping out the main jet to a 145 (the next smallest size I had handy), but it was doing the same thing. I tried then switching to a 160 main, and it seemed a little better, but then it was doing the same thing. I thought maybe it was something more complicated than just the carb, so I checked the valve clearances. They all looked good and were in spec. In the process, I checked the sparkplug and it looked suspect, so I replaced it. No Dice, still sputtering at 4-7k rpm. I was riding it, trying to further diagnose it, and I noticed some white smoke coming out the exhaust (coolant?). The Oil looks normal (no milkshake of death) on the dipstick, so maybe not a head gasket issue. Would that even cause the problems I've been having? I also noticed a screw had escaped from the top of the carb (that holds the black cover on). Surely that must be the problem! I replaced it and... still the same issue. I tried recording the issue, though apparently didn't have much space on the memory card, and the sound is not as clear as I expected. I can try re-recording some footage to demonstrate the issue. Anyone have any idea what could be the problem? I may just try to revert as much back to stock as I can (don't have the stock exhaust). I am beginning to wonder if the issue is not related to the carb at all. Thanks in advance.
- 9 replies
-
- 1
-
-
- DRZ
- carburetor
- (and 2 more)
-
I purchased a JNS Engineering LED headlight for my 2009 DR-Z400S. The headlight comes with a main connection to hook up the low/high beam and also an extra wire that powers daytime running light bar. What I would like to do is wire that extra wire in for the daytime light to always be on. Then splice a toggle switch in to the headlight main connection to be able to toggle off the low/high beam (just daytime light on and low beam off). Would this be easy to do? What should I wire the daytime light in to and where should I splice a switch to the headlight?
-
Hello all. I need some help with jetting my european DRZ400SM, my current configuration is as follows: - 3x3 mod, restricted solenoid valve, stock exhaust, Twin Air foam filter - Mikuni 36, Dynojet Stage 2 (3110.002 - U.S. only) - 150 MJ, DJ needle, 3rd clip, 3,5 turns out (22,5) I tried to set jetting according to manual and then change it to as above (and multiple anothers combination), but its still not the best configuration. Here are my symptoms - Bike runs fine, fine acceleration, but has a flat spot before 6000 RPM (calculated by current gear and speed) and while cruising. After it gets over 6k RPM it runs fine and strong. Before that and while cruising there is slight hesitation. I had needle on 5th clip before (for a long time), recently i have changed it to the 3rd and its mutch better, but with hesitation as i descibed above. I want to try change needle to 4th so I will see if it helps, then try to use one size smaller main jet and needle to 2th but I want to check it with you before I will try this - I don't have all day to trying it Today I was testing main jet again and I think its run a little bit better (just a little :D) without side cover -> so it's probably rich. My questions: Do you know on which elevation is Dynojet tested? I am on cca 400m (1300 ft) above the sea with temperatures around 23°C (73°F) so I would like to make a sure the reccomended settings for Dynojet Stage 2 will work for me. Also I read that DRZ eu model has different air jet so I am also not sure if i don't need to change anything else than what comes with DJ by default. If you have any suggestions on jetting that may works, please comment :). Also I am enclosing current spark plug - i guess the color is ok, maybe a little bit rich. Thank you.
-
How do I fix this mess I've gotten myself into? I was adjusting valves and turned the engine over without the cam chain tensioner in place and ended up with the arrows at 11:30 and not 12:00. The bike is at TDC compression stroke. I am in the 15th pin though.
-
Hello everyone, This is my first post here so I apologize if I'm posting in the wrong thread or something like that. Anyways, a few days ago(Friday the 13th) I decided to take my 2001 Drz400E out for a spin in the woods outside my neighborhood. Long story short, I drowned the thing. Three hours and a lot of cussing later and I got the thing out of the mud and back home. Moral of the story? Stick to the trails. When I got the thing back home I discovered two problems: 1.) The bike was leaking coolant, No clue where from. 2.) The bike wouldn't rev over 4.5k rpm. If I give it more gas, it stalls. I did some research on the rev thing and apparently cleaning the carb/jet fixes this(If anyone can confirm this it'd be helpful). I removed the carb, cleaned it, and everything looks fine. I haven't tested it, however, because of the coolant leak. I figured running the bike with next to no coolant probably isn't a good idea. I also don't feel like putting everything back on the bike just to end up tearing it apart to fix the other stuff. I heard from a friend that water could have caused a gasket to leak, but I'm not exactly eager to tear apart my engine to find out. If you guys could give me any advice, it'd be a big help(Especially since I've got a road trip planned for memorial day).
-
Hi! I know this issue has been beaten to death but after reading through a lot of material, I'm even more confused. I have a 2007 DRZ 400 sm with everything but the muffler stock for now. I have just ordered the JD jet kid and plan to do the 3x3 at the same time as I rejet. Currently on the bike I have a Scorpion muffler that the previous owner put on it. The quiet insert is broken (previous owner) so I've been running without it since the beginning. I'd like to get a quality full exhaust to take advantage of the rejet and airbox opening. I don't really plan on going any further than that as far as modifications go, at least it will be a few years before I get a FCR, cams or a big bore (might upgrade to a 690 or a 701 before it comes to that anyways). I have read excellent reviews everywhere for the MRD/SSW but I also saw that it's pretty obnoxiously loud. I ride in busy small streets 95% of the time and I'd rather not ride with earplugs all the time. Considering I already have an open exhaust (see the pic), how much louder would the MRD be? I don't really care about max performance, I just want the bike to run as good as I can. I'm quite used to a loud exhaust but I don't want something a lot louder than that. I'm pretty sure the Yoshi RS2 with the quiet insert would be quieter than the completely open Scorpion. Right ? I mean it still has the stock header on so that might not be true… Price wise the MRD is cheaper and the shorty version would be the best in terms of aesthetics (but also the loudest right?). I like the carbon fiber muffler of the Yoshi and the heat shield but that big ass red kanji sticker bothers me. Anyway, what would you guys do if my priorities were 1) Bike running perfectly 2) Not "all the neighbors want to kill me" loud 3) Neat looking 4) Good bang for the buck. Thanks!
-
This is a battle I have fought ever since I got my bike. I have had the carburetor rebuilt, also re-jetted with a JD Jet kit. I have the 160 main jet, 25 pilot jet, and blue needle on the 3rd clip. 3X3 mod, yoshi exhaust, and this is on the BSR36 carb. When the bike gets warm, when I come to a very hard stop the bike slowly drops in revs and dies out. I am trying to get better at stoppies, and every time I put the back wheel down the engine is already dead. I cant progress any further unless I get this issue fixed. I have gone through all the vacuum lines, made sure there is no fueling issues up until the carburetor. I have pulled the bowl off many times thinking that the float is stuck and I have never found it stuck. If anyone has any ideas of what it could be, any ideas would be greatly appreciated!! Thanks everyone!