Search the Community
Showing results for tags 'suspension'.
We're rebuilding the search index for faster, better results. Current results may not be complete.
-
 I decided to change to oil in my forks and shock on my '12 KLX250S, I'm around 6k miles, and I am also wanting to check and regrease the swingarm bearings. Well, I ordered the oil, and after successfully doing the front, once I pulled the shock, I noticed the schrader valve is missing as well as the bleeder screw. I called a reputable local dealer service shop who told me the shocks are no longer rebuildable, pretty much disposable. At nearly $700 I would certainly not replace the stock shock, but upgrade for probably less money. Anyway, I found that these are charged with nitrogen, just as the old shocks, but either done in a pressure chamber or with a syringe needle through the small rubber hole in the cap. After a few checks online, RaceTech sells the shrader valve cap and needles. Adding a bleeder screw would have to be done by a machine shop. I am pretty sure, as I disassembled my '96 KDX200 many times, that this bike is really a copy of that bike, with a 4 stroke motor and USD forks. Super reliable, that old 200. So here you can see the lack of shrader valve on the canister. Below you can see the flat spot at the top where the bleeder would have been. Draining the nitrogen Removing the compression adjuster valve body to drain the shock since it has no bleeder Tapping down the cap to remove the circlip Circlip kept spinning, found it easiest to use a 90 deg pick on the end of the clip to pry it out of the groove The old 200 shocks you just grabbed the shrader valve cap and pulled the whole body out, had to go old school. Original cap against bladder, RT cap below This below is the inside of the factory cap. Hmm could have probably threaded a shrader valve in there. Lots of hole length. Since this has no bleeder cap, when I reassembled I pulled the compression valve body with it as the highest point for air to escape, after priming the shims and topping off and reinserting the shaft and circlip. Very messy, but no air left in shock through full stroke both directions. Here's the parts, shout out to RaceTech for having these kind of parts for us guys, I believe this works with Hondas and others without the shrader valve. Why any manufacturer would use the same shock body and remove the bleeder and shrader cap is beyond me, I mean bikes are built pretty well these days, but this issue is straight BS. Charged with compressed air to test for leaks and had Rocky Mountain Cycle Plaza put N2 in at 142 psi. A slight amount of oil came out on the outside of the shaft seal, but I would attribute that to me not putting compressed air in the bladder before topping off, still no air and good action both ways. Going back on the bike tomorrow to set sags and test drive in the chop.
- 7 replies
-
- 1
-

-
- suspension
- shock
- (and 1 more)
-
I recently bought these shocks online and the seller stated they are Yamaha DT100. I have two other DT100s and the tube has a smaller diameter. The other dimensions match up with my other DTs. Does anyone recognize these identification numbers or these particular shocks? Any help would be appreciated. The fork diameter is 27 mll.
-
I need help figuring out how to improve my suspension. I have an 02CR250 that was setup for a 225lb class A MX rider this past August. I have swapped out the spring for a GNCC 170lb rider. I got a quote to have the forks and shock revalved for $400. Is that a good price? How is the setup for MX different from GNCC as it relates to calving? Are there any other alternatives like ordering valvinh set up for my and I installl?
-
So i have a 1997 XR200. The shock is ok, but i picked up a rear shock from a 1982 model for cheap as i hear they are able to be rebuilt and are a better shock. Can someone link me the items required to rebuild it? Thanks, Jon
-
I've been going through SDI to get my suspension valving shims but is there a better place to find shim kits?
-
I just bought a drz400S 2004(Great bike btw). The problem is that the rear shock is VERY Squishy. I am 6.2 and weight around 155 pounds. When riding the bike, I even slip off the seat due to the incline there is. Is there any way to make the suspension stiffer? Without having to change parts, adjusting only the original ones? Any help is welcomed. Thank you.
-
Hi everyone, Wrapping up my very first bottom end rebuild soon and very excited to see how things go. I've followed the clymer manual as closely as possible and watched many videos during the process so I feel very confident the engine will fire right up. After speaking with my girlfriend about it she's decided she wants to go for a ride with me some time (after I've done plenty of test rides of course) and maybe purchase her own bike if she enjoys it, and my question now is how to adjust the travel of my rear wheel to accommodate for the weight of two riders. We'd both put ~ 300 lbs combined on the bike, and I remember last time I had a passenger with me my rear tire kept smacking the fender and a bolt from my exhaust nearly punched a hole through it. Obviously want to avoid that. Does the screw on the soda can near the seat adjust travel or just the rebound? Or do I need to take the spring off and adjust it outside of the bike? I'm still learning the ins and outs of my DRZ after owning it three years and would appreciate any help to further my knowledge of the machine. And yes, I realize this can be found in the manual, but I also find words of experience to be incredibly helpful. Thanks again everyone Brandon
-
Aloha, I am extremely new to the pit bike world. I bought my son a used ssr 70cc. My understanding was they upgraded the front suspension and it now has inverted suspension. Recently we are getting little to no recoil/rebound. I am looking for suggestions on fixes, or replacemeent suspension.
-
Whats up all I picked up my 20 390rrs last weekend and so far I really really enjoy it! I'll be the first to admit that the bike is better than I am off road thats for sure! I've been riding for years on and off but like a typical squid/noob I don't think I've ever had a bike set up correct for my weight/abilities (proper sag). Now that I've got the Beta I feel its a solid dual-sport platform for me that I plan on keeping a while. (mostly off road use) I'm interested in getting my suspension tuned to get the most out of the stock equipment.... I read the beta is set up from factory for about 180lb rider. I currently tip the scales at 215,after water and boots aluminum skidplate etc I'm guessing i'll be around 230 all up. My question is will springs be enough to get me pointed in the right direction? Or will I need a whole revalve? As it sits the bike has a better suspension than anything I've owned (even with me being so heavy) Any tips or pointers in the right direction would be greatly appreciated! Really hope swapping springs will be sufficient for now and I won't have to do a complete revalve on a brand new bike lol Thanks in advance I can't wait to see where this bike takes me!
-
Hello fellow ThumperTalkers. I recently bought a 2020 YZ250 and have some questions on the suspension. Here is some back story: - I am 130lbs w/o gear - Mid-pack B class rider (still new to the 250 2-stroke so I am trying to get to the top of B class) - I had a 2016 YZ125 and left the springs, sag, compression, and rebound completely stock. The bike handled perfect, but I never adjusted the suspension so I don’t know if it could have been better Now with the YZ250. As I said, I am 130lbs w/o gear. Would I be able to get away with using the stock springs? If you’re around my weight and own a 2006+ YZ250 with stock springs, what is your setup (compression, rebound, etc.)? BTW, I will be raising my forks up 7mm in the triple clamps. Any help would be greatly appreciated!
-
I bought a used 03 Honda crf150f. If I push down on the seat of the bike, the bike will compress down and bounce up a few times quickly. I don’t know a whole lot about dirt bikes but I’m guessing it shouldn’t be that bouncy. When I ride and I stand up on the bike, it’s bouncy as well if I try to push my feet up in the pegs and bounce up and down. So I’m guessing it’s either the shock is bad or the forks are blown? Maybe the suspension needs adjusted? I know some basic stuff but I don’t know much about dirtbike suspension. I know my description isn’t that great but what do you think the issue may be?
-
I have a small leak in my fork seal and I’m wondering if it’s normal. I tried getting in there and making a seal saver to clean it out but I’m having a hard time taking the dust seal of while it’s on the bike and I don’t see how putting it on a bench will make it any easier. Should I try harder? Should I even worry? It’s so small you almost can’t notice it unless you wipe your finger on it and it gets a little slicker. I hope this makes sense. Thanks
-
 Leaky fork seals may be seem like minor problem, but it can lead to further damage of your fork internals, and even handling and braking safety. In this guide, we go through each step you need to know to replace oil and dust seals in your bike. Whether you’re out with friends or at the track on race day, leaky seals can ruin any day of riding, especially if that blown seal is on the brake side. When your forks seals are just leaking or won’t hold hardly any oil at all, your forks won’t dampen or rebound the way they’re intended to. The oil helps create bottoming resistance, allowing the fork to stay up in the stroke where it is intended to perform. Staying on top of leaking fork seals is critical to maintain optimum suspension performance. Remember, improperly operating suspension is a safety concern. Most current generation forks contain a closed cartridge, which houses the damping and rebound valving as well as oil. The outer chamber houses the fork spring plus additional oil. When the forks main seals blow, it’s the oil in the outer chamber that leaks out. As oil seeps out through the seal and down the lower fork leg, dirt and debris can stick to the tube. The initial size of the tear in the seal may be small and somewhat unnoticeable, but after dirt makes its way past the dust wiper, it damages the seal itself, causing oil to leak out more rapidly. You won't need to disassemble your fork this far for a seal change only, but it helps to be able to visualize the components inside your forks and where the oil is leaking from. Unaddressed leaking fork seals can lead to dirt working its way through the fork internals, likely leading to more damage and potentially costly repairs. Replacing fork seals is something that can generally be done in a well-equipped garage with the help of some standard tools and supplies, plus a couple specialty tools that are readily available. It’s important to note that different suspension manufacturers have different methods of disassembly and reassembly, so always be sure to reference your owner’s manual for guidance specific to your application. This guide is intended to be a general how-to and not all steps will be the same across all applications. In this step-by-step guide, we replaced the fork seals on a set of used Showa closed cartridge forks off a 2007 Honda CRF 450R. For the purpose of this guide, we will focus on a simple seal replacement to get you back on the track or trail rather than a full cleaning of the outer chamber and seal replacement. The first step before you begin your repair is ensuring you have the correct tools in your arsenal, and a set of new seals to install. Trying to “MacGyver” things with the incorrect tools can easily result in more repairs and more cost to you. Below is a list of tools we used for this project: Be sure you have the proper tools and a clean work space before you begin. Specialty suspension tools are readily available online. 47mm ProX fork seal kit Torque wrench (recommended from a reputable company for accuracy) Socket wrench (3/8 drive) 8mm socket or 8mm T-handle wrench 10mm socket or 10mm T-handle wrench 17mm, 19mm, 21mm sockets 17mm open end wrench 5mm Allen wrench Fork cap wrench #2 flat head screw driver 47mm fork seal bullet 48mm fork seal driver Seal and O-ring grease 5W fork fluid (or whatever is recommended in your manual) Pen and paper 600 grit wet/dry sand paper Work bench vise with rubber padded jaws Oil drain pan Suspension-specific cleaning chemical (ex: Maxima Suspension Clean) Microfiber towels **NOTE: Tool sizes may vary depending on the suspension’s manufacture. There are many choices when sourcing new seals. OEMs are great, but can be overpriced. ProX oil seals and dust seals are made by the same OE suppliers in Japan to meet OEM quality without the price tag. They are available both individually and as sets. Be prepared and order new seals before disassembly. Fork oil and dust seal kits from ProX are made by OE suppliers to OE specifications and are provided at a more budget-friendly price. They're available from most of your favorite online parts retailers or local dealers. ProX also offers kits with bushings for forks with more hours on them. Want to find your part number? Search your bike and find it here. To start, it is always a good idea to have all your tools laid out on a clean work bench or table. Start by placing your bike on a stand and removing your front wheel, then your forks. Be sure to remove the fork guards and brake caliper (when applicable) before loosening the triple clamps and removing the forks completely. Remove your front wheel, fork guard, and brake caliper (if on the brake side) before removing the fork from the triple clamps. Check your rebound clicker settings using a flat head screwdriver and write them down. To do this, turn the clicker clockwise, counting each notch you feel until it stops. Once it stops, do not force it. The number of clicks is your setting. You will need to reset to this after reassembling your fork. If you don't know where your clickers are set, it's a good idea to check and record them so you can reset upon reassembly. Now, with the clicker settings recorded and the fork(s) completely removed from the bike, we can begin the seal replacement process. Place the fork in the vise by clamping it by the axle lug. Using a socket/wrench, fully loosen the bottom bolt underneath the axle lug. Be careful with this step, it can be a bit tricky. Once the bottom bolt is loose, you will need to compress the fork by pulling the top of the fork toward the axle lug. With the fork compressed and the damping rod exposed, using the fork end of the fork cap wrench, slide the damping into the middle of the “U” shaped prongs behind the jam nut and slowly let the fork rebound to lock the tool against the axle lug. You’ll need an open-ended wrench, a socket/wrench, and two hands for this step. Place the open-ended wrench on the jam nut and the socket/wrench on the rebound bolt and loosen the rebound bolt. Remove the rebound bolt from the damping rod along with the internal adjusting rod. Compress the upper tube toward the lower tube to remove the fork cap wrench from the damping rod jam nut and release the tension on the spring. Remove the fork from the vise, being careful not to spill any oil, and reposition the fork in the vise so the upper fork tube is clamped moderately tight with the top of the fork angled down. It is important to clamp in the middle of the tube where it is the most round with no taper. This is where the bottom triple clamp holds the fork. Using your flat head screw driver, separate the dust seal from the upper tube. Then, remove the internal seal clip from the groove inside the upper fork using the flat head as well. Use the flat head to separate the dust seal from the upper tube and to remove the seal clip (second photo). With these parts cleared from the tube, grip the lower tube with one hand and the upper tube with the other. Slide the lower tube into the upper tube, then quickly pull the lower tube away from the upper tube with enough force to separate the two tubes with the oil and dust seal remaining on the lower tube. Remove the slide bushing, guide bushing, base washer, oil seal, seal clip and dust seal from the top of the lower tube, making sure to place them on the work bench in the order they came off. It is also very important to note how the oil seal was positioned. Incorrect positioning will not seal oil. Using a clean microfiber, clean your lower tube and inspect the tube for dings and sharp burrs that may have caused the seal to leak. If nicks and burs are found, use the 600-grit wet/dry sand paper lubricated with the suspension clean to remove any sharp edges. Wipe the tube down with a clean micro fiber rag to remove contaminants from sanding and place the tube on your work bench. **NOTE: ONLY use the sand paper WET and ONLY to remove specific burs. Do not rub the entire tube as you will scuff the friction-reducing coating on the tube and cause pre-mature bushing wear. Inspect your guide and slide bushings, washers, snap rings, and O-rings. If any of them show damage or excessive wear, you may want to consider replacing them. If they look okay, a good cleaning should be sufficient. If they need to be replaced, fork bushing kits can also be sourced from ProX with same OEM quality and affordability of the fork seals. Inspect and clean your bushings, washers, clips, and O-rings. Should anything be damaged, replaced or excessively worn, consider replacing with a new bushing kit. Click here to check out ProX bushing kits. After cleaning the bushings, apply seal and O-ring grease to the Teflon coating of the bushings as well as the inside of the oil seal and dust seal for lubrication. Place your seal bullet over the fork tube far enough to cover the side bushing journal. In this order, slide the dust seal on the tube, then the seal clip, oil seal, base washer and guide bushing. Remove the seal bullet and place the slide bushing back in the journal. Gently place the lower tube back over the damping rod and into the upper tube far enough to allow the slide bushing to hold the tube in place. Slide the guide bushing and base washer into the upper fork tube. Using your seal driver, drive the base washer down and into the tube opening. Repeat this process with the oil seal, making sure to drive the seal far enough to expose the grove for the seal clip to fit in. Place the seal clip in the tube, making sure the clip fits in the grove 360 degrees around. Lastly, use the seal driver to drive the dust seal into place at the bottom of the upper tube. **NOTE: It is extremely important to make sure the seal clip is secured in the groove. This clip holds the seal in place and keeps the lower fork tube from separating from the upper tube. Un-clamp the upper fork tube from the vise being careful not to tilt the fork down and lose oil. Reposition the fork in the vise and clamp it by the axle lug with the fork cap angled down. Carefully compress the upper tube to expose the damping rod through the bottom of the axle lug and place the forked end of the fork cap wrench behind the jam nut. Slowly release the tension allowing the tool to settle on the bottom of the axle lug. Re-install the adjuster rod and rebound bolt onto the damping rod. Using the open-ended wrench and socket/wrench, tighten the rebound bolt until it bottoms out against the jam nut. Compress the upper fork tube towards the axle lug to remove the holding tool. Thread the rebound bolt into the axle lug and torque to the specification in your owner’s manual. Reset the rebound clicker to your desired settings. Reposition the fork in the vise again with the fork cap angled up, clamped moderately tight. Using your fork cap wrench, loosen the fork cap from the upper tube. Do not fully remove the cap from the tube. Remove the fork from the vise and place upright on the floor. Fully unthread the fork cap from the upper tube and slide the outer tube down. Now, add a measured amount of oil to the fork. This will be an estimated amount of oil depending on how much oil you have lost due to the leaky seal. In most cases, 10-20cc’s of oil will be adequate, however, it’s important to make sure you have your manual’s recommended amount of oil in your fork. Slide the outer tube back up to the fork cap and thread the cap into the tube. Using your fork cap wrench in one hand and holding the fork tube in the other, jerk the cap tightly onto the fork to seal the cap to the tube. If replacing seals in both forks, repeat this process for the remaining fork. Re-install the fork(s) on the bike as well as the fork guard(s), brake caliper (if applicable), and front wheel. It is important to consult your service manual for all torque specs when tightening bolts.
- 10 comments
-
- 10
-
-

-
- forkseals
- suspension
- (and 5 more)
-
 Change the oil, clean the air filter, lube the chain – these are general maintenance items for dirt bikes and ATVs. But how many other maintenance items should you be keeping an eye on? Unfortunately, there are many more items that need attention that owners are unaware of, and that’s proven in the 300+ page ProX dirt catalog containing thousands of performance replacement part numbers. Ensuring the bearings on your bike or ATV that come in contact with dirt and dust (which is all of them outside the engine) are properly lubed and maintained is an essential part of off-road maintenance. It’s important to ensure your wheel, steering stem, swingarm, and linkage bearings all get the attention they deserve, and we’re here to help with some tips on getting this done properly. It’s easiest to take things one step at a time, so let’s begin with linkage bearings. Normally, tracking hours or close inspection will tell you when it's time to service linkage bearings. In this case, however, no closer inspection was needed. The first question you may ask is, “how do I know how often to inspect and service these bearings?” The owner’s manual supplied with your bike is the first place you should reference followed by your bike’s factory service manual. Most service manuals specify similar inspection and service intervals. As an example, a commonly referenced interval for linkage bearing service/inspection is 3 races or 7.5 hours. What may come as a surprise is how often these bearings are supposed to be getting inspected. The good news is these inspections – and even the parts replacements – are fairly easy to do. For the purposes of this article, we’ll dive straight into assuming you’re ready to replace linkage bearings and show you how you can accomplish this with basic tools in your own garage. If you’re not sure if they need to be replaced, scroll to the bottom of this article for our inspection tips below. Replacing the Linkage Bearings The linkage we’re working with here is from a 2003 Kawasaki KX250. This bike overall, let alone the linkage bearings, had excessive neglect in maintenance and the bearings were extremely overdue to for lubing and needed to be replaced completely. This is more common than you might think. Along with a constant feed of dirt and grime (the linkage is essentially under constant roost spray from the front wheel), water from the pressure washer can get past the seals and sit in the bearings for an extended period of time, leaving the needles rusted and ultimately damaged through extended use. This is exactly how your linkage bearings SHOULD NOT look. Especially the one completely rusted solid. Removing the Old Bearings The most ideal tool to press bearings in and out is a hydraulic press, but we realize not everyone has one of these in their garage and they may not want to go out and buy one. Therefore, we’re running through this process by simply using a bench vise and various-sized sockets. There are five bearings in a typical dirt bike linkage knuckle - two in each larger opening and one in the smaller end. Depending on the model, your bike may also have a linkage arm that contains one or two bearings as well. The process outlined below applies to each of these components. The bearings themselves consist of an alloy shell/housing that houses the needle bearings, a rubber seal for each side of the linkage openings, and a sleeve or pin that inserts into the bearing and rides on the needles. If you're at the point of a complete linkage rebuild, be sure the bearing kit you order includes all needed components. Before pressing out the old bearings, remove the sleeves and the seals. These should come out fairly easily by hand, but if any are extremely rusted-in, it might require some additional force. Once these components are removed, we’re ready to press out the bearings. What you’ll need is two sockets, spacers, or something similar that’s cylindrical and hollow. The smaller socket should be almost the exact size of the bearing’s outer housing, so it just fits inside the opening of the linkage and rests firmly on the bearing housing. The other socket should be big enough to rest completely around the opposite of the linkage opening, inside this socket is where the old bearing will fall once pressed completely out. Choosing the proper sizes for this is critical, so take your time and carefully inspect where the socket will be putting pressure. If you choose incorrectly sized sockets, you risk marring the machined lips where the bearing seal lies. Choose your socket sizes carefully. Mock them up on each side to make sure you're not at risk of damaging the linkage knuckle itself. Once you have your sockets chosen, place the small socket against the housing of the old bearing and the big one against the opposite end, and line up the entire thing between the vise jaws with the small end against the sliding jaw and the big end against the static jaw, just as pictured below. Now, take your time and slowly clamp the vise in small turns, continuously ensuring your small socket is entering the linkage opening straight and not jamming sideways. If it ends up crooked, back it out, reposition, and start again. Patience is key here, damaging the inner wall of the linkage opening could mean buying an entirely new linkage knuckle. Linkage bearings are an interference fit, so a modest amount of force will be required. If it seems you’re having to apply excessive force for very little movement, you can try heating up the outside of the linkage knuckle with a torch or heat gun. However, be careful not to apply too much heat so you don’t cause permanent damage to the alloy, and always use extreme caution. The old bearing should push out the other side into the big socket, and voila, you’re ready to move to the next bearing. Repeat these steps for each of the other bearings in the linkage knuckle but be sure to choose the proper size sockets for each one, as the bearing sizes will vary. Installing New Bearings After the linkage is free of old bearings, clean everything up and make sure it’s free of dirt and debris before installing your new bearings. New linkage bearing kits can be sourced from ProX for a long a list of bikes and come complete with new needle bearing assemblies, seals, and inner sleeves. Pressing in the new bearings involves essentially the same process and equipment as pressing the old ones out. When you're ready to press the new bearings in, you'll take the same approach. Make sure to line up the new bearing as straight and even as possible against the bearing opening to ensure it presses in straight. Be sure to take your time and make sure you’re pressing the bearing in straight and not applying uneven stress that could break the new bearing or damage your linkage. Cooling the new bearings down in the freezer before installing is an easy way to help the alloy contract slightly, allowing them to press in without much trouble. Using this method should eliminate any need for heat unless you’re working in excessively cold temperatures. Notice the new bearing - between the linkage and small socket - is partially pressed in. Continue pressing in small and careful increments until it's completely in the opening. When pressing each new bearing in, reference your factory service manual to see if there is a specific depth they should be seated, otherwise you can make note of the old ones’ position before removing and match it. Once your new bearings are pressed-in properly, the next step is grease. Yes, they’re new, but that doesn’t mean they don’t need additional grease. Don’t go overboard and pack the whole opening with grease, but do make sure there’s a nice layer of waterproof grease worked into the bearing housings for the needles to settle into. Be careful during this process not to accidentally remove any needles from their housing, they are not fixed in place. Once the bearings are prepped, add a little bit of grease to each new seal and set them in place. Sometimes the smaller seals can be pressed in place by hand, but they'll typically need some gentle motivation to seat all the way in. If you don't have a seal driver set, the socket and vice method works for seals as well. However, take extra care not to damage the seal, they are easily bent or broken when applying force. Use the appropriately sized socket, line up the seal and socket evenly in the vice jaws, and press very slowly until the seal is completely and evenly seated. Seals will not require nearly as much force! Finally, insert the new sleeves and you’re ready to bolt your linkage back on the bike! As always, torque all fasteners to proper specs. Take your time and stay on top of this simple maintenance task. Trust us, your shock will thank you! Search for new bearings and other components you need for your machine here Shock Linkage Bearing Inspection Tips Look at the condition of the seals to be sure they are not tattered, torn or missing. Gently lift the rear of the bike and feel for free play within the shock linkage system. Another way to inspect the condition of the bearings is to push down on the seat and compress the rear suspension (bike off the centerstand). Assess the smoothness of the system as the shock decompresses. If there is significant free play or the suspension does not rebound smoothly these are indicators that the linkage bearings or bushings need to be serviced.
- 9 comments
-
- 7
-
-
-
- linkage
- suspension
- (and 5 more)
-
Hey guys, I recently sold my 2001 YZ 125, and bought multiple YZ's... a 1998, a 2001, and a 2002. I rode all 3 and I know for a fact the 1998 YZ is the most quick. When you throttle it, it will go. The 2001 YZ 125 is average. Lastly, the 2002 is really fast (fastest YZ 125 I've ever ridden), but has no compression. It's weird that it has no compression, yet it's the fastest. I'm not sure what the PO's did with the carb or piston on the 1998 and 2002. I am selling the 1998 and the 2001, but keeping the 2002 YZ 125 since it has the updated plastics and stuff. Anyways, the suspension on the bikes are all garbage, and since I'm selling two, I don't want to fix it. But for my bike, how can I fix it? It is extremely bouncy, and when I go over a small hole, I literately jump 1 foot out of my seat and land really hard. If I harden the shocks, it will have no rebound and will also throw me off. What should I do? Also, shouldn't I set it up to my weight? Do I set the sag or does it need to get set up by a company like Pro Circuit? I would probably leave the front forks the way it is, unless it's required. Let me know, thanks.
-
-

suspension How Suspension System Works in ATV/UTVs
jake gu posted a topic in General ATV / UTV Discussion
Today we’re going to be talking a little bit about automotive suspensions and how they work to smoothen the ride of your car. There are mainly three purposes of the automotive suspension system. First, they support the weight of the vehicle. Second, they maintain accurate tire contact with the ground. And third, they absorb any shock that you get through the road when you hit a bump. Most modern vehicles come with an independent front suspension. Which means if one wheel hits a bump it does not disturb the other wheel. Nowadays, people use Coil Spring to support the majority of weight in the car. As it has a really good characteristics for absorbing any bumps as you go up and down on the road. However Springs aren’t very good at dissipating that energy. In fact that’s why you have the shock absorber. Which is there to smoothen out the ride and make sure the tire maintains contact with the road. In modern passenger vehicles the two most popular suspensions are McPherson strut and double wishbone style of suspension. The main advantage of the McPherson strut suspension is that it’s really cheap and simple that’s why a lot of manufacturers are moving towards this design. The double wishbone design allows the wheel to stay perpendicular to the body as it navigates a corner or as it goes over a bump. And that maintains good tire contact patch no matter where the wheel is situated. Another advantage of this design is that it can be made adjustable where you can control the position of upper control arms ball Joints. Click to Know More About Ball Joints and other Suspension Components -
Can anyone give me the dimensions of the cartridge holding tool for the sachs oc fork? I need to get the catridge out and i dont have time for the tool to be shipped. I can see in the piccs its a small tube and it has 3 notches in the end to accept the cart. but i need the I.D., O.D and length of the tube. also the width of the notches would help. Thanks alot if you can help me
-
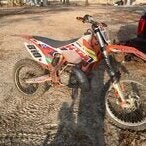
I’m relatively new to dirt biking, I blew out the shock on my 06 125 and I’m trying to figure out the size of the shock I need (not trying to get a OEM) if someone can link me the size/ where to find a fitting shock it’d be much appreciated ?
-
I need help with my suspension set up, I just got a 2016 kx450f and the guy I got it from said he had it set up for him weighing 200lb. But me being only 140 its been killing me in the breaking bumps and just stiff as hell. I tried messing with everything. I went back to the stock setting for 155lb and it was still really hard. Any suggestion?
-
I have 05yz125 and do mostly trail ride. I’m 5’8” and don’t ride often enough. I was considering lowering the stance of my bike to see if it make it easier to handle in tight trails. Any thought on linkage changes and how to adjust the front forks accordingly?
-
Hi, I have a 2003 DRZ (actually a KLX400) and the head tube bearings are shot. I ordered a new set to install but I'm wondering if anyone has any recommendations on other parts I should replace while I have the front disassembled. I was thinking about new rubber fork protectors, but are there other things that wear out on the DRZ front ends that you can only get to when disassambled? I also broke off a replacement key that I got for the steering lock. I must have been made of cheap pot-metal. Should I just remove the whole lock mechanism? Any tips or tricks for getting the old bearings out and the new ones in would be welcome! Thanks!
-
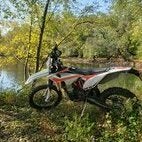
A few picks of my winter project.
- 38 replies
-
- 6
-
-
- CRF230F
- lightweight
- (and 2 more)
-
 I’m a DIY’fer all the way. But I’m wondering if I can change my Factory Connection springs (front: from .48 to .50, rear: from 6 to 6.7) on my 2012 YZ250 without changing other parts (other than obviously the seals for the forks) and if so what parts and where to buy them? There’s only a few parts available in the FC site that I could find. I already ordered my springs. What other type DIY service can be done? Any advice/guidance will be greatly appreciated! #yz250 #factoryconnection #doityourself #suspension #onabudget #frontforks #rearshock #spring #kyb
 -
Hi. I bought a Yamaha PW80 for my son (actually he bought it). It was relatively cheap and I thought everything on it is probably cheap to replace. Long before I expected it he is jumping it and the suspension is bottoming out. I was shocked when the bike shop told me it's high AU$300s for the rear suspension. There are aftermarket for AU$50 - AU$100 however I am very skeptical about the quality. Can anyone give me some advice please regarding a reliable aftermarket, whether there is a reconditioning kit, any other suggestions. I'm in Australia. Thanks Chris